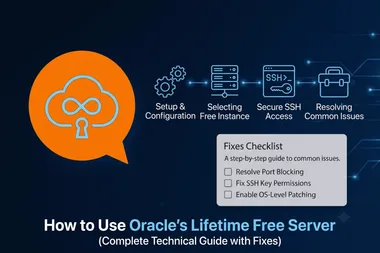
📝 How to Use Oracle’s Lifetime Free Server (Step-by-Step with Issues & Fixes)
1. Introduction
Cloud computing has become the backbone of modern applications — but server costs can be a barrier for students, developers, and startups.
Oracle Cloud Infrastructure (OCI) offers something unique: an Always Free Tier that includes compute, storage, and databases for life. Unlike AWS and GCP, this tier doesn’t expire after 12 months.
In this blog, we’ll cover:
What’s included in Oracle’s Always Free Tier.
How to set up your server.
Common issues faced during setup and usage (with resolutions).
Best practices for running production workloads.
By the end, you’ll not only know how to launch and use your free server, but also how to debug problems that many beginners encounter.
2. Oracle Always Free Tier Overview
Oracle offers two free options:
Free Trial → $300 credits valid for 30 days.
Always Free Tier → Unlimited duration, includes:
Resource | Specs |
|---|---|
Compute | 2× AMD Micro VMs (1 OCPU, 1 GB RAM) OR 4 OCPUs + 24 GB RAM Ampere A1 (ARM) |
Database | 2 Autonomous Databases (20 GB each) |
Block Volumes | 200 GB |
Object Storage | 10 GB |
Load Balancer | 1 instance |
Outbound Data Transfer | 10 TB/month |
💡 Why Oracle Free Tier is better than AWS/GCP:
AWS only gives 750 hours/month of micro instances for 12 months.
Oracle gives a 24 GB RAM ARM VM for free, forever.
3. Prerequisites
Oracle Cloud account → Sign up.
Valid credit/debit card for verification.
Working phone number (for OTP).
Basic knowledge of Linux, SSH, and networking.
⚠️ Issue: “Payment Method Declined”
Oracle rejects some local debit cards.
✅ Fix: Use international Visa/MasterCard, or a prepaid virtual card (Payoneer, Privacy.com).
4. Setting Up Your Free Server
Step 1: Sign Up and Choose Region
Visit cloud.oracle.com/free.
Complete signup, verify with OTP + credit card.
Select your region carefully → some regions (Mumbai, Tokyo, Frankfurt) often have more availability.
⚠️ Issue: “Region not available for free resources”
Some regions restrict Always Free shapes.
✅ Fix: Try another nearby region (e.g., Singapore instead of Mumbai).
Step 2: Create a VM Instance
Go to Menu → Compute → Instances → Create Instance.
Give a name →
oracle-free-vm.Select Shape:
Best choice: VM.Standard.A1.Flex (ARM) (up to 4 cores, 24 GB RAM).
Backup: VM.Standard.E2.1.Micro (AMD) (1 core, 1 GB RAM).
Choose OS image → Ubuntu 22.04 recommended.
Networking:
Auto-create VCN (Virtual Cloud Network) if first time.
Ensure Public IP is assigned.
Upload your SSH public key.
Click Create → Instance will be provisioned in ~2 minutes.
⚠️ Issue: “Out of capacity for shape VM.Standard.A1.Flex”
Oracle often runs out of free capacity in popular regions.
✅ Fix:
Retry during off-peak hours.
Reduce OCPUs (try 1 core + 6 GB RAM).
Switch to another region.
Step 3: Connect via SSH
From your local terminal:
ssh -i ~/.ssh/id_rsa opc@<your_public_ip>Default user:
opcReplace
<your_public_ip>with the VM’s public IP.
⚠️ Issue: “Permission denied (publickey)”
Cause: Wrong or mismatched SSH key.
✅ Fix:
Ensure you used the private key corresponding to the public key uploaded.
Fix permissions:
chmod 600 ~/.ssh/id_rsa
Step 4: Basic Server Setup
Update system:
sudo apt update && sudo apt upgrade -yInstall essentials:
sudo apt install git curl ufw htop -yConfigure firewall:
sudo ufw allow ssh
sudo ufw allow http
sudo ufw allow https
sudo ufw enable
⚠️ Issue: Locked out after enabling firewall
Forgot to allow SSH before enabling UFW.
✅ Fix: Log in via OCI Console → Networking → Security Lists → Allow inbound TCP port 22.
Step 5: Deploy a Web App
Install Nginx
sudo apt install nginx -yCheck in browser: http://<public_ip> → Nginx default page.
Deploy Node.js App
curl -fsSL https://deb.nodesource.com/setup_18.x | sudo -E bash -
sudo apt install -y nodejs
git clone https://github.com/heroku/node-js-sample.git
cd node-js-sample
npm install
node index.js
Reverse Proxy with Nginx
Edit default config:
sudo nano /etc/nginx/sites-available/defaultserver {
listen 80;
server_name _;
location / {
proxy_pass http://127.0.0.1:5000;
proxy_set_header Host $host;
proxy_set_header X-Real-IP $remote_addr;
}
}Reload Nginx:
sudo systemctl restart nginx⚠️ Issue: “502 Bad Gateway”
Node app not running, wrong port, or killed after logout.
✅ Fix:
Run persistently with
pm2:npm install -g pm2 pm2 start index.js pm2 startup
Step 6: Add Free SSL with Let’s Encrypt
sudo apt install certbot python3-certbot-nginx -y
sudo certbot --nginx -d yourdomain.com
⚠️ Issue: “Domain not resolving”
DNS not pointing to Oracle server.
✅ Fix: Add
Arecord in domain registrar → Public IP of VM.
Step 7: Attach & Use Free Storage
Create block volume:
oci bv volume create --compartment-id ocid1.compartment.oc1..xxxx \
--availability-domain AD-1 --size-in-gbs 100
Attach & format:
sudo mkfs.ext4 /dev/sdb
sudo mkdir /mnt/storage
sudo mount /dev/sdb /mnt/storage
Persist by editing /etc/fstab.
5. Security Best Practices
Disable root login:
sudo nano /etc/ssh/sshd_config
# PermitRootLogin no
sudo systemctl restart ssh
Disable password login → SSH keys only.
Enable unattended upgrades:
sudo apt install unattended-upgrades
sudo dpkg-reconfigure --priority=low unattended-upgrades
Use Security Lists / NSGs in OCI for IP whitelisting.
6. Monitoring & Management
View usage:
htop
df -h
free -m
Set up OCI Alarms → CPU > 80%, Memory > 90%.
Automate deployments → Terraform (Resource Manager).
Keep alive → Prevent idle shutdown with a simple cron:
*/10 * * * * curl -s https://google.com > /dev/null⚠️ Issue: VM stopped automatically
Free tier VMs sometimes auto-stop.
✅ Fix:
Enable Always-on in instance settings.
Use above keep-alive cron.
7. Common Issues & Fixes
Problem | Cause | Resolution |
|---|---|---|
Out of capacity error | Region full | Try other regions / off-peak |
Payment method declined | Unsupported card | Use Visa/MasterCard, or virtual card |
SSH “Permission denied” | Wrong key / perms | Fix |
Locked out by firewall | Didn’t allow SSH | Fix via Security Lists in OCI console |
Server stopped | Auto-shutdown by OCI | Enable keep-alive cronjob |
Port not reachable | Security List blocks traffic | Add ingress rule for port in VCN |
502 Bad Gateway | App not running | Use |
SSL certbot failed | Domain DNS missing | Point A record before certbot |
Slow network speed | Wrong region far from user | Deploy in region closest to audience |
8. Real-World Use Cases
Hosting WordPress/portfolio/blog.
Deploying Node.js, Django, or Flask apps.
Free PostgreSQL/MySQL server for projects.
Private VPN/proxy.
Running Docker/Kubernetes for learning DevOps.
CI/CD pipelines for GitHub projects.
9. Conclusion
Oracle’s Always Free Tier is one of the most underrated cloud deals. With up to 4 OCPUs and 24 GB RAM, free databases, and 200 GB storage, you can run projects that normally cost $30–50/month elsewhere.
Yes, you’ll face issues like capacity shortages, SSH errors, or server shutdowns — but with the troubleshooting steps we’ve covered, you can make the most of this free server.
👉 Start today at cloud.oracle.com/free, and unlock enterprise-grade cloud infrastructure at zero cost.